This instruction applies to the following app: Checklist for Jira | Enterprise by Herocoders
By integration, we consider an ability for users to save Checklist app values as a part of Easy Template’s issue template and then restore/add checklist value to the created Jira issue.
There are two types of integrations that are possible:
-
Option 1. Using
Checklist Textcustom field -
Option 2. Using issue labels
Option #1. Integrate Checklist for Jira with Easy Templates using Checklist Text custom field
How to save the issue checklist as part of the Issue Template
-
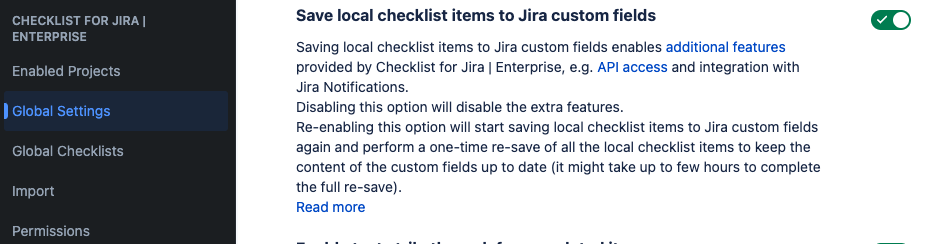
First of all, make sure to enable the custom fields integration within the Issue Checklist for Jira “Global Settings”.
-
Go to Jira settings → Apps → Checklist for Jira | Enterprise → Global Settings
-
Enable Save local checklist items to Jira custom fields
-
-
Make sure
Checklist Textis added to Jira Issue Edit screen in Screens configuration -
To make Jira issue screens less cluttered - you may hide the custom field using “Configure” option in Issue screen
-
Add checklist items
-
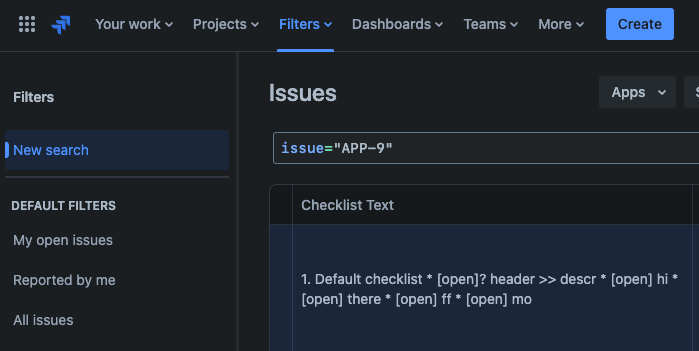
You can see if an issue has been updated by showing the “Checklist Text” field as a column in the advanced issue search.
-
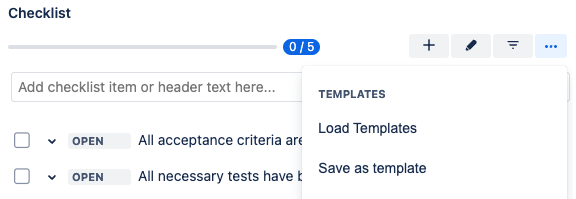
Save an issue template via Easy Templates app.
Checklist Textfield values would be saved into the template as well.
How to restore saved checklist from Issue Template
-
That’s it! Now, when you create a new issue from the Template - Checklist would be populated with the saved checklist automatically! 🚀
How to see and manage saved checklists in Issue Template
-
Make sure, the
Checklist Textfield is added to the global Create Issue Jira screen -
Go to Apps → Easy Templates for Jira
-
Open Template and you’ll see the saved template as Custom fields in the checklist app’s text format
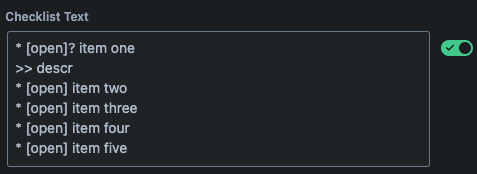
Mind the formatting!
Since Easy Templates moved to Forge and Atlassian uses API v3, the “Checklist Text” field now uses Rich Text format. Manually typing text values corrupts checklist items generated from the template.
To fix this, preserve Issue Checklist markup and properly enter its value into the Checklist Text field by following these steps:
-
Go to the existing Jira issue
-
Open the issue checklist app
-
Enter checklist edit mode (pen)
-
Copy text and markup
-
Return to the template management
-
Find the “Checklist Text” field
-
Paste the value into the “Checklist Text” field using CMD(CTRL)+SHIFT+V
-
so that the markup format is preserved
-
Option #2. Integrate Checklist for Jira with Easy Templates using issue labels
In short - consider using an approach, described in an article https://docs.herocoders.com/checklist/adding-templates-to-issues.
-
Save Checklist template
-
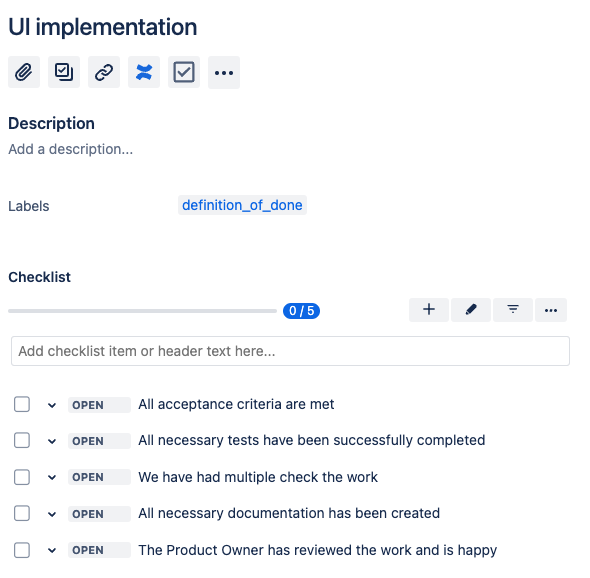
assume you need to create Definition of done checklist
-
add checklist to an issue
-
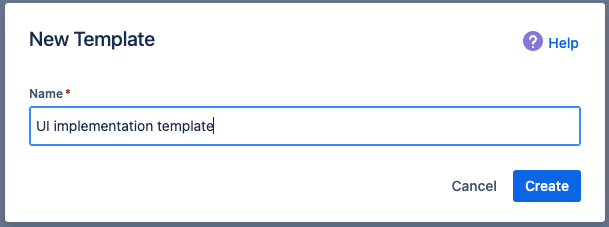
Save as template
-
Give it the name “defninition_of_done”
-
-
Create an Issue label called “definition_of_done”
-
Save Jira issue as a template via the Easy Issue Template app
-
The issue Template should look like
Having label added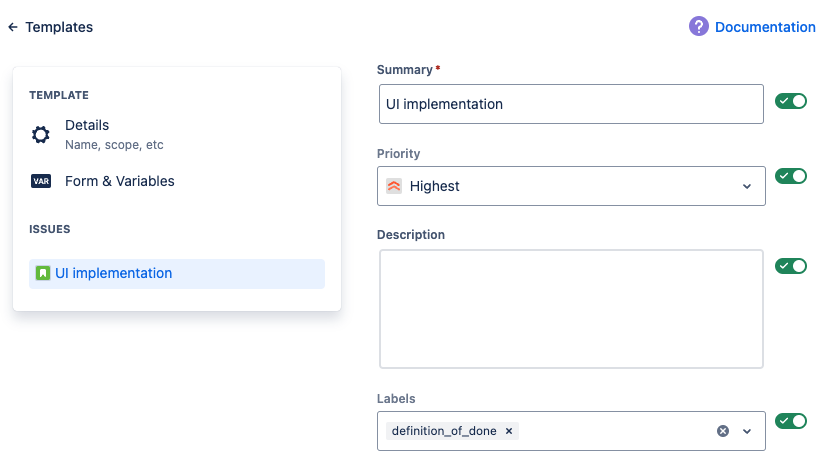
-
Now, when creating a new issue from that template, the checklist template will be automatically applied based on the defined issue label per checklist functionality 🎉