Easy Issue Templates for Jira enables you to use Issue Templates through Jira Automation by leveraging specific triggers or integrating with other tools via REST API. This functionality ensures that your workflows remain interconnected and efficient.
Use Cases
-
Scheduled time-based Issues creation: Create monthly Financial tasks
-
Sub-tasks creation: Apply QA subtasks on the User Story transition
-
Bulk templates usage: Create issues when a New Project created
-
Create issues once a Service Desk ticket is raised: New employee onboarding process
✅ Enable the Automation feature
You must have System Admin permissions
-
Make sure Easy Issue Templates is installed.
-
Navigate to Apps → Manage Apps → Easy Templates → Settings.
-
Enable Automation toggle.
.png?cb=c91d10d2d2d011fae2d81744dc75413f)
Once enabled, Project Admins can configure template-specific webhooks and payloads.
🔧 Set-up Automation per Template
You must have Project Admin or System Admin permissions
Generate Web Request URL and Payload
-
Go to Manage Templates → choose a Template → Automation.
-
Toggle Enabled.
-
Click Generate new URL to create a unique webhook URL for that template.
This URL will be used in your Jira Automation rule or other external tools.
.png?cb=8e29cc101b23f098572055cdce801261)
Prepare Payload
-
Choose Operation:
-
Create Issues – Generates new issues from the template. You’ll need the target Project ID, which you can set dynamically using a smart variable (e.g.,
{{project.id}}) in Jira Automation or choose from the list provided. -
Apply Template – Applies the template to an existing issue, including sub-tasks or child issues creation
-
-
Review Variables
If your template uses variables, check and prepare their values. -
Review Payload:
You’ll use this payload when configuring the webhook action.
.png?cb=a1e3d8cc7155af0f16ebe72834bc11f9)
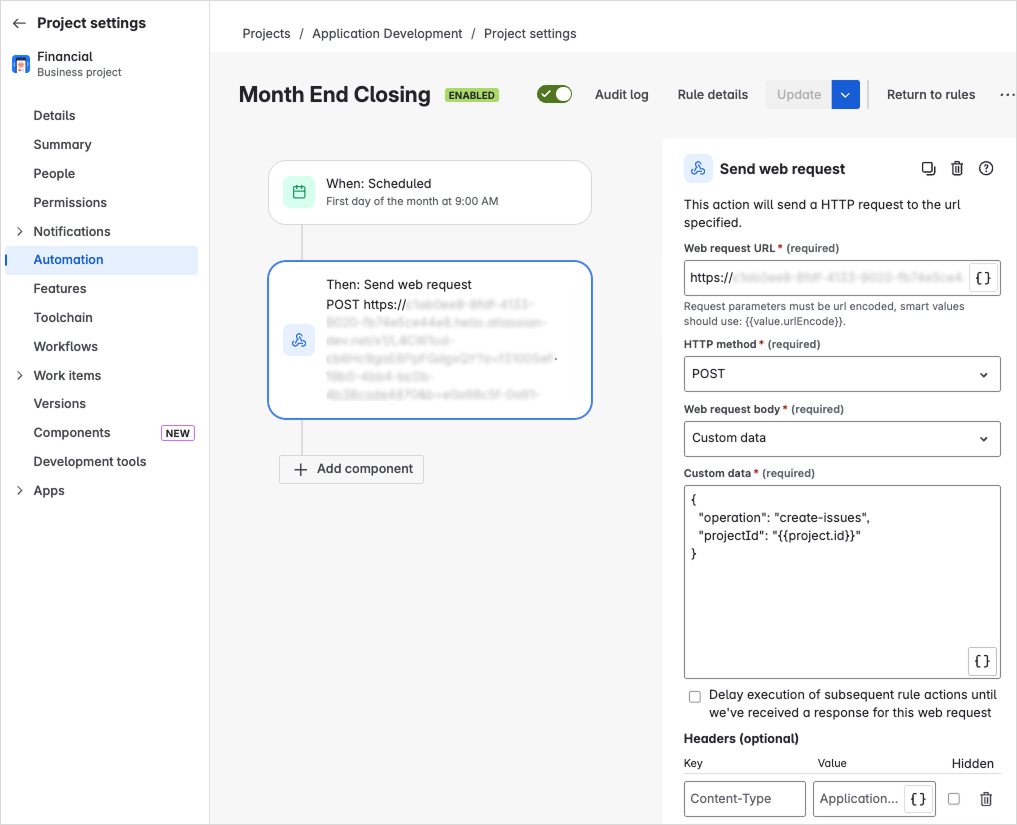
⚙️ Creating a Jira Automation rule
You must have Project Admin or System Admin permissions
-
Go to Jira Automation (Project or Global settings).
-
Create a new Automation Rule.
-
Select any Trigger you need.
-
Add an Action → Send web request.
-
Paste the Web Request URL generated in your template’s Automation settings. (https://appliger.atlassian.net/wiki/spaces/ET/pages/edit-v2/3286073349#Preparing-Web-request-URL-and-Payload
-
Use POST as the HTTP method.
-
Choose Custom Data as the Web request body.
-
Paste your prepared Payload into the Custom Data field.
-
Save and enable the Rule
NEW: add the “actor” to the payload to set the Reporter of the created issues
Example:
{
  "operation": "create-issues",
  "actor": "put account ID or email here",
  "project": "{{project.id}}"
}